


Materials
- Bucket
- Bleach (as long as the label says it's for fabric but the one I used is multi-purpose)
- Water
- Stick and or Gloves
- Clothing item
- Plastic Bag
- Rubberband/Hair Band
Approx. Time: 30 minutes.
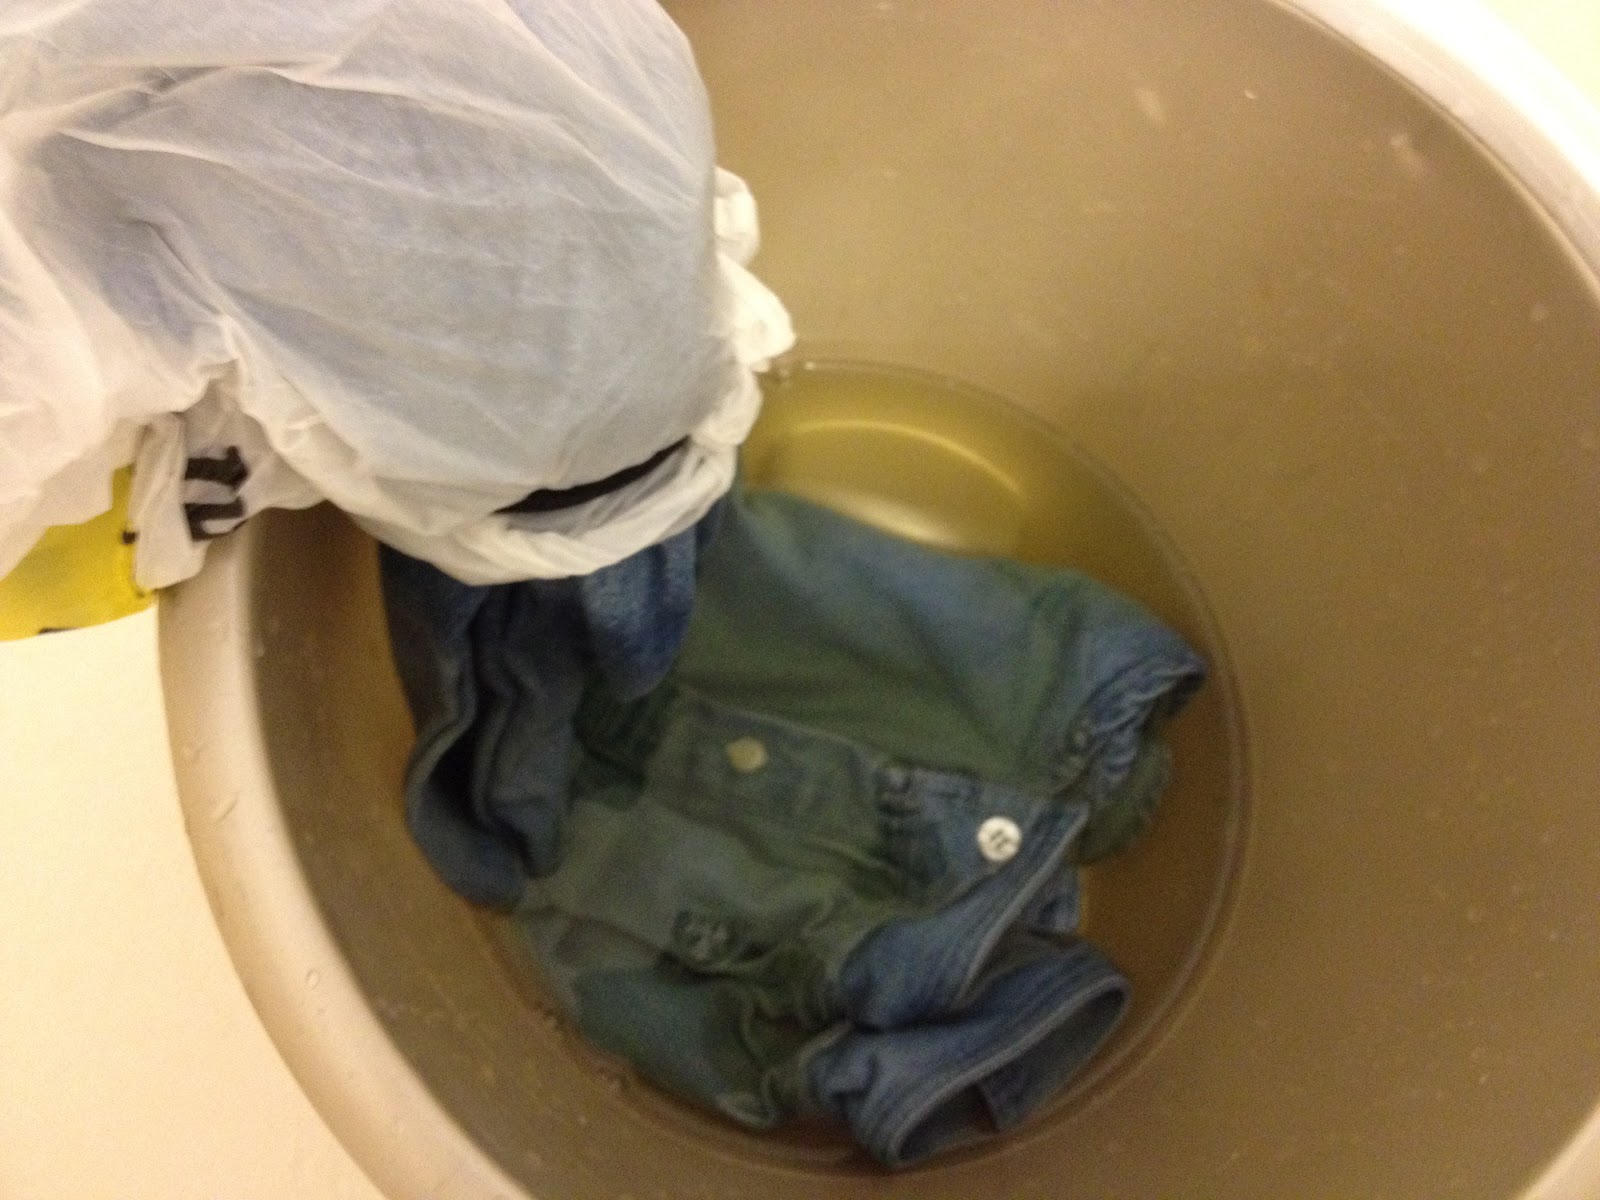
- First you're going to take a clean shirt and portion off the part where you DO NOT want bleach to touch with the plastic bag. This will prevent bleach from splattering. Secure with rubber band or hair band.
- Wet the exposed part of the shirt so there is no harsh lines. (I do not know if it really helps so it's your call if you want to; I just watched other tutorials and some people wet the shirt before)
- Fill bucket with water. Make sure you put enough water to go up to the part you want bleached. Add a couple of table spoons of bleach. You can always add more bleach. (If going for the dip dye look use 1:1 or 1:2 portions bleach to water.)
- Immerse shirt into bucket and use stick to poke it down. You want to make sure it goes on evenly and so it doesn't go on lop sided. Immerse for about 3 minutes. The bleach I used made it look like the shirt was light but after it dried it went to completely white.
- Keep moving up the shirt for the ombre effect by immerse the bottom parts longer. Continue moving the shirt as time goes by. The bottom of the shirt should be in the bleach the longest.
- Rinse out bleach after a couple of minutes and throw it in the wash by itself. You should see the end result after you dry it!
I'm really happy with my first attempt because I never worked with bleach before. I suggest trying it but I warn you that the smell of bleach is very very strong and as I'm typing this I still smell it. If you're too young ask your parent to help you and make sure you do this in a bathtub or outside.
For $5 I made this shirt with some patience and I know some stores will sell shirts like these for over $30. Bleaching clothes is really fun and I suggest bleaching more than one item so the bleach does not go to waste.
I really like the way this turned out, I don't know if I'd be able to do it because I can't stand the smell of bleach though!
ReplyDeletewow,you are great, it looks so cool.I like the t shirt.
ReplyDeleteNice work, it really did turn out great. I love how cheap the whole look was to create too. Way to go :)
ReplyDelete